
How to Fix Nail Peeling and Splitting at Home
She glanced at her hands during a morning coffee break—the soft sheen of care was the quiet reminder that small rituals matter. But today, a tiny snag caught on her sweater sleeve. One layer peeled back, then another, leaving her thumbnail thin as paper. You can almost feel that sandpapery edge when you run your finger over it, the kind that hooks on everything and sends up a small flare of frustration. It’s the stress you didn’t plan for, the little tear that somehow mirrors the long week: endless handwashing, cleaning, rushing, and a few too many gel removals.
Maybe this is familiar. The nail that splits just when you’re about to meet a friend for dinner. The peeling layers that make polish look bumpy, no matter how steady your hand is. Sometimes it’s seasonal—dry air, hot showers, colder days. Sometimes it’s lifestyle—detergents, keyboards, or skipping your cuticle oil for the third day in a row. Often, it’s a combination.
Here’s the comforting part: your nails respond beautifully to consistent, gentle care. They’re not static; they’re growing, changing, rebuilding. And learning how to fix nail peeling and splitting isn’t a single trick. It’s a series of easy habits, a smarter file, a better base coat, a few food choices that quietly support keratin from the inside out. Nothing dramatic. Just a calm, practical routine.
Imagine your hands a month from now: the free edge looks tidy, the surface looks smooth, and a sheer pink polish glows instead of chips. You moisturize after washing without thinking about it. You file in one direction while your favorite show plays. A small shift in rhythm, and your nails start to reflect a steadier life.
Let’s be honest—quick fixes are tempting. A hardener that promises instant strength, another layer of polish to hide the damage, a glitter topcoat to distract. But the secret is slower, softer, and much more effective. We’ll walk through exactly what to do—step by step—and how to keep the results.
You deserve hands that feel cared for, not just polished.

Quick Summary: This guide shows how to fix nail peeling and splitting with gentle habits, nourishing nutrition, smarter filing, and an easy at-home repair routine.
Why nails peel and split
When nails peel, the top layers of keratin separate. When they split, a deeper crack runs down the nail plate. Both can stem from dehydration and friction.
Common culprits:
- Constant handwashing and hot water
- Harsh removers, especially frequent acetone use
- Aggressive filing or buffing
- Picking gel, acrylic, or dip instead of proper removal
- Dry, low-humidity environments
- Cleaning chemicals and detergents
- Seasonal changes, especially winter
There are internal factors, too. Insufficient protein, low iron or zinc, and chronic stress can affect keratin quality. Some health conditions—thyroid imbalance, eczema, psoriasis, or fungal issues—may change nail texture. If peeling and splitting persist for months, or you notice pain, discoloration, or nail lifting, see a dermatologist.
The good news: most cases respond to consistent moisture, protection, and gentle technique.
Daily habits that heal peeling and splitting
When you’re deciding how to fix nail peeling and splitting, begin with small daily shifts. These habits take minutes but compound fast.
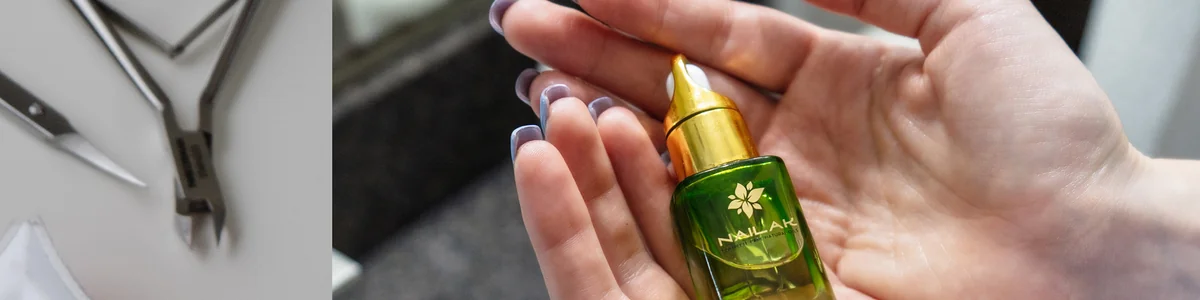
- Seal in moisture after every wash. Use a fragrance-free hand cream, then a drop of cuticle oil. Finish with an occlusive balm before bed.
- Treat water like sandpaper. Wear gloves for dishes and cleaning. Prolonged soaking weakens keratin bonds.
- Switch your remover. Choose non-acetone or acetone with moisturizers. Remove polish once a week, not daily.
- File smarter, less often. Keep nails short and slightly rounded. File only to refine the edge, not to shape aggressively.
- Stop picking. If a layer lifts, gently file it down and cap the edge with base coat.
- Give nails buffer days. Allow 24 hours bare between manicures when possible.
Small, consistent care beats occasional overhauls. Think “hydrate and protect” every time your hands meet water.
Smart nutrition for stronger nails
Nails are made of keratin, a protein. Strength begins in your diet.
Focus on:
- Protein: eggs, Greek yogurt, tofu, lentils, chicken
- Iron: beans, spinach, fortified cereals, lean red meat
- Zinc: pumpkin seeds, chickpeas, cashews
- Omega-3s: salmon, sardines, chia seeds, walnuts
- Biotin-rich foods: eggs, almonds, sweet potatoes
- Hydration: water, herbal tea, water-rich fruits
A quick snack plan:
- Mid-morning: Greek yogurt with chia and berries
- Afternoon: Almonds with a clementine
- Dinner add-on: Lentil salad with olive oil and lemon
Supplements can help if you’re deficient, but they aren’t a magic wand. Biotin may improve brittle nails for some people, but it can interfere with certain lab tests. Speak with your healthcare provider before starting supplements. Any nutrition-based change takes time—expect 8–12 weeks to see nail growth benefits as new keratin appears.
Gentle filing and shaping techniques
Filing can either protect your nails or slowly weaken them. The difference is technique.
- Use a fine-grit file (180–240 grit) or a glass file.
- File in one direction, from the edge toward the center.
- Keep nails short to reduce leverage and peeling.
- Avoid rough buffers and coarse files that tear layers.
- Do minimal surface buffing, just enough to smooth ridges.
The “seal and shield” method
- Shape with a fine file.
- Apply a ridge-filling or strengthening base coat.
- Brush polish across the free edge to “cap” it.
- Use a quick-dry top coat that remains flexible, not brittle.
Choose a length and shape that protects
A soft “squoval” or rounded shape resists catching and tearing. If your nails peel, short is not a sacrifice—it’s a strategy. Keep the free edge under 2–3 mm until the splitting stops.
As the holidays approach, fun nail art can be a mood-lifter. If you try seasonal designs, prep is everything: smooth edges, a hydrating base, and gentle removal later. For inspiration, lightweight DIY manicure ideas—think cozy tones and simple accents—are trending as an accessible way to celebrate. (source: https://helloglow.co/thanksgiving-nails-easy-diy-ideas/)
At-home repair: step-by-step routine
Here’s a calm, weekly routine to fix nail peeling and splitting. Set a playlist. Breathe. Go slow.
- Cleanse without soaking
- Skip long soaks. Instead, wash hands and dry well.
- Rub a drop of cuticle oil into each nail to soften debris.
- Gently tidy the cuticle line
- Use a rubber-tipped pusher after oiling.
- Don’t cut living tissue; trim only hangnails.
- Refine the edge
- Use a glass or 240-grit file.
- File in one direction. Round the corners slightly.
- If you see layers, file until the edge feels smooth.
- Reset the surface with restraint
- If there are ridges, lightly buff once a month at most.
- Over-buffing thins the nail. Aim for “just enough.”
- Apply a treatment base
- Choose a strengthening base with gentle actives like hydrolyzed keratin, calcium, or plant proteins.
- Avoid harsh formaldehyde hardeners if your nails peel easily; they can make brittle nails snap.
- Seal the edge
- Brush base coat under and over the free edge.
- This reduces water absorption and peeling.
- Color is optional, protection is not
- If you polish, use two thin coats of a breathable or flexible formula.
- Finish with a top coat and cap the edge again.
- Night repair ritual
- Massage cuticle oil into nails and skin for 30 seconds per hand. Jojoba-based oils penetrate well.
- Seal with a pea-sized amount of balm or petroleum jelly over each nail.
- Slip on cotton gloves for 20 minutes or overnight.
- Weekly refresh
- Remove polish with a gentle remover.
- Repeat steps 3–8. Consistency is the cure.
Emergency fix for a split or tear
When a split threatens to travel, stabilize it.
- Clean and dry the nail.
- Trim any snagging edges.
- Place a small piece of tea bag or silk wrap over the split.
- Dab on a small amount of brush-on nail glue through the fiber.
- Let dry, then lightly buff to smooth.
- Seal with base and top coat.
This temporary bridge buys time while your nail grows past the weak point. Replace weekly until the split grows out.
Product label decoder
- Look for: hydrolyzed keratin, plant proteins, panthenol, glycerin, jojoba, squalane.
- Avoid frequent use of: formaldehyde or formalin hardeners if nails are already peeling.
- Consider: a cross-linking treatment with dimethyl urea if guided by a pro; it’s gentler than classic hardeners.
When to see a professional
DIY care is powerful, but some signs call for expert eyes.
Seek help if you notice:
- Splits that reach the nail bed or bleed
- Pain, swelling, or pus
- Brown, black, or green discoloration
- Nails lifting from the bed
- Pitting, severe ridging, or thickening
- Peeling that doesn’t improve after 8–12 weeks of care
Ask salons for gentleness:
- Soak-off gels rather than drills on natural nails
- Foil removal with oil under wraps
- No aggressive e-filing on the nail plate
- Rounded, short shaping to minimize stress
If you suspect a skin condition or nutrient deficiency, consult a dermatologist or primary care provider. Targeted care beats guessing.
Daily choices that strengthen results
Think of your hands moving through the day. Every contact is a chance to protect your repair work.
- Keep mini hand cream and oil in places you pause: desk, bag, nightstand, car.
- Reapply after every wash. Even one drop keeps layers flexible.
- Use tools instead of nails—open cans with a gadget, not your thumbnail.
- Choose microfiber cloths for cleaning; they snag less.
- Take a polish break every few weeks. Let your base coat and oil do the heavy lifting.
Set reminders if needed. You’re training a new reflex.
A ritual that restores confidence
There’s a moment—maybe on a Sunday night—when your routine becomes more than maintenance. The warm water, the careful filing, the tiny circle of oil on each nail. It feels like taking inventory of your week, quietly, without judgment.
Learning how to fix nail peeling and splitting isn’t just about smoother edges. It’s a promise you make to yourself: I will be gentle. I will be consistent. I will choose protection over punishment. That promise shows up in small ways—your sweater doesn’t snag, your hands look polished even without color, you tap an email with nails that feel strong.
Care is cumulative. So is confidence. One mindful ritual at a time.
Frequently Asked Questions (FAQ)
Q: What’s the fastest way to fix nail peeling and splitting?
A: Smooth the edge with a fine file, apply a strengthening base, and cap the free tip. Use cuticle oil twice daily and seal with balm at night. Wear gloves for chores. This combo stabilizes damage while new growth appears.
Q: Which oil is best for repairing peeling nails?
A: Jojoba oil is a star because its small molecules penetrate well. Look for blends with vitamin E, squalane, or sweet almond for extra slip. Apply after washing and before bed, then lock it in with a balm.
Q: Do gels or dips help or hurt peeling nails?
A: They can protect by creating a barrier, but removal can undo progress. If you use them, insist on soak-off removal with oil and no aggressive filing of the natural nail. Take breaks and keep nails short to reduce leverage.
Q: Is biotin effective for splitting nails?
A: Biotin may help some people with brittle nails, but results vary. Many see benefits only if they were low to start. Talk to your doctor before supplementing, and expect 2–3 months to see new growth changes.
Q: Should I cut or push back cuticles when repairing nails?
A: Don’t cut living cuticle tissue; it’s your nail’s natural seal. Soften with oil, gently push back with a rubber pusher, and trim only hangnails. Keeping the cuticle intact reduces splitting and infection risk.
Estimated word count: ~2,040 words