
How to Repair Nails After Acrylics
The Sunday light found its way across your kitchen table, slow and bright as sugared tea. A small bowl of warm water, scented with lemon, waited beside a folded towel. You traced the rim with your finger, listening to the soft clink of your cuticle pusher against a saucer. Your acrylics were finally off. What’s left is tender: faint ridges, a chalky matte sheen, a whisper of snag where the nail once felt glossy and invincible.
You stretch your hands and notice the stories your nails tell. The last-minute appointments. The photos you took with iced coffees. The tapping through emails and errands. Now they feel quieter, almost shy. As if they’re asking for your permission to heal.
You breathe in, lift the towel, and begin. A few drops of oil catch the light. The scent is gentle—almond, a little herbal, like a garden after rain. Each fingertip warms under your touch. The dryness softens. You can almost feel the smoothness returning beneath your thumbs. It’s not instant. But it’s certain. Repair is like that: not dramatic, just consistent.
Let’s be honest—removing acrylics can leave nails fragile and pouting. They’ve been under armor for weeks, sometimes months. Now it’s time to be kind. The good news is that with the right rhythm—short, simple steps repeated daily—your nails can regain their strength and shine. And you don’t need a suitcase of products to get there. You need a plan, patience, and a little ceremony. Think of it as a reset, a return to the way your hands want to feel.
So you dip your fingertips again. The water is soft. The lemon slice floats like a small sun. You pat dry and reach for your glass file. A gentle curve, a sigh of dust. You’re not trying to erase history. You’re making a more beautiful next chapter.

Quick Summary: Learn how to repair nails after acrylics with a gentle 2–4 week routine focused on protection, hydration, nutrition, and mindful care.
What acrylics do to your nails
Acrylics aren’t villains. They’re simply strong. The application and removal process, though, can thin the top layers of your natural nail. Filing and acetone make nails more porous. That’s why they can feel dry, bendy, or peel after removal.
When the protective coating comes off, nails lose moisture fast. They catch on fabrics. Cuticles can look frayed. The nail plate may show ridges you never noticed before. These signs are normal.
The repair approach is simple: protect, rehydrate, and avoid further stress. Think of nails like delicate fabric. You’ll strengthen the weave by keeping it clean, supple, and supported while it mends.
Your first 48 hours: gentle triage
The first two days set the tone. Keep your nails short, cushioned, and calm.
Do this immediately:
- Cleanse kindly. Wash hands and nails with a mild, non-drying soap. Pat dry.
- Seal the edges. Shape with a glass file. Use short, one-direction strokes.
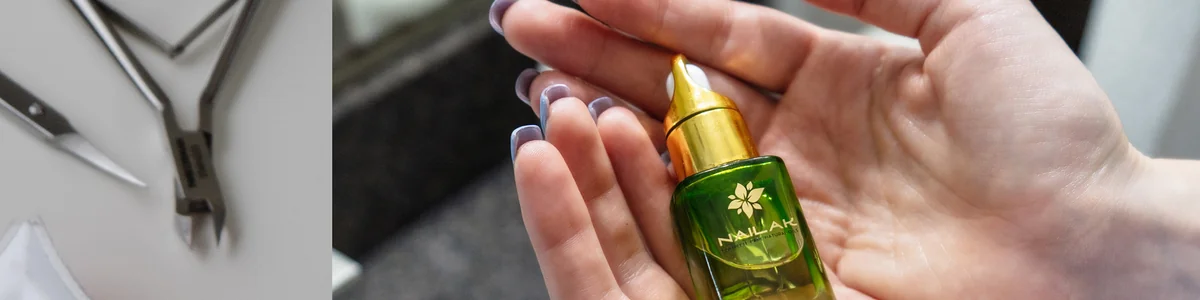
- Oil-and-occlude. Massage in jojoba or sweet almond oil. Top with a balm. Cotton gloves overnight help lock it in.
- Layer a breathable base. Choose a strengthening base coat without harsh formaldehyde. Look for ingredients like keratin, calcium, or plant-derived oils.
Avoid this for 48 hours:
- No picking, prying, or aggressive buffing. Let the surface be.
- No hot water soaks. Heat can expand the nail and then dehydrate it.
- No harsh cleaners. Wear rubber gloves for dishes and cleaning.
- No immediate reapplication of acrylics or hard gels. Give your nails a breather.
An easy day-and-night rhythm:
- Morning: Wash, pat dry, thin coat of base, and hand cream.
- Midday: A drop of cuticle oil on each nail.
- Night: Oil-and-occlude with a balm, then cotton gloves.
Small actions, repeated, will give your nails the best start.
Daily repair rituals that work
Here’s how to repair nails after acrylics with a consistent, two-to-four week plan. This routine respects your natural nail cycle and aligns with real life.
Hydrate like it matters:
- Oil, then cream. Oils penetrate. Creams seal. Layer them.
- Focus on the matrix. That’s the growth center below your cuticle. Massage there.
- Choose oils that resemble skin’s natural sebum, like jojoba. Add squalane for slip.
Create a protective shell:
- Use a strengthening base coat every two to three days. Remove gently with non-acetone remover and reapply.
- Ridge fillers can smooth texture and prevent snagging.
- Avoid rigid “hardener” formulas that rely on formaldehyde. They can make thin nails brittle.
Treat cuticles as living borders:
- Push gently after a warm shower; never cut deeply.
- Apply a ceramide-rich balm around the nail fold to keep the seal intact.
Nail-friendly hand habits:
- Keep nails short and softly rounded while they recover.
- Tap keys with your fingertip pads, not the edge of your nails.
- Wear gloves for chores to avoid waterlogged, swollen nails.
Weekly reset (once per week):
- Remove old polish or base with a gentle, acetone-free remover.
- Soak a minute in lukewarm water with a drop of cleanser. Pat dry.
- Lightly buff only if the surface is peeling. Aim to smooth, not thin.
- Oil massage for two minutes. Then apply base coat.
A small beauty note: many of us love the idea of overnight renewal. As skin editors often say, nighttime is prime time for repair. The same mindset supports your nails—consistent evening hydration can shift their texture by morning. The appeal of “better by morning” spans skin and nails alike. (source: https://www.harpersbazaar.com/beauty/skin-care/g69887886/best-night-cream-moisturizer/)
Think of your days as cycles. Mornings protect. Evenings replenish. Weekends check progress and reset. Nails love rhythmic care—just like the rest of you.
Smart nutrition for stronger nails
Topical care is half the story. Your nails grow from within.
Aim for:
- Protein at every meal. Nails are keratin. Give them building blocks.
- Omega-3s for flexibility. Think salmon, walnuts, chia seeds.
- Iron and zinc for strength. Lean meats, legumes, pumpkin seeds.
- Vitamin C to support collagen. Citrus, berries, bell peppers.
- Hydration, always. Dehydration shows first in skin and nails.
Biotin has some evidence for brittle nails, though not all cases need it. If you choose a supplement, keep it simple and consistent. Always check with your healthcare provider, especially if you take other medications.
When to trim, file, or let them be
Short nails are safer while you repair. Edges chip less. Peeling slows.
- Trim when there’s white length, not before.
- File in one direction with a glass file. Avoid sawing.
- Skip daily buffing. Once a week is plenty, only if needed.
- If a layer peels, smooth the edge, oil, and seal with base coat.
Let your nails rest between coatings. A bare day here and there allows you to track texture and sensitivity. If you sense tenderness, return to oil-and-occlude and give them a quiet day.
Salon visits without the damage
You can love the salon and still protect your nails.
Ask for:
- Soak-off gels or soft builder gels, not hard gels or thick acrylics, while you heal.
- A gentle e-file approach by a trained tech, or hand filing with high-grit buffers.
- EMA monomer, never MMA. MMA is too rigid and can be damaging.
Insist on removal that respects your nail:
- No prying or forced lifting. Soak, don’t yank.
- After soak-off, request a light touch—no aggressive scraping.
- A post-removal oil massage and a breathable base coat.
Plan your sets:
- Alternate “on” phases with restorative breaks. Two to three weeks on, one week off.
- Consider sheer, strengthening overlays to protect while you grow length.
- Carry cuticle oil in your bag. A quick noon massage can change everything in a month.
Your nail tech is a partner. Share your goal: strong natural nails. The right pro will tailor services and timing to support it.
Mindful beauty: patience and progress
The best part of repair is the ritual. It asks you to pause. To notice your hands as they fold around a mug or reach for your keys. To feel the small victory when a snag you used to hide no longer catches on your sweater.
Nails grow slowly, about three millimeters a month. That pace invites grace. The way we treat our nails often mirrors how we move through our days—rushed, or present. When you oil your cuticles at night, you’re also telling yourself, “I have time to care for me.”
Here’s the secret: strength isn’t only a finish line. It’s built in quiet layers. Every gentle file, every glove you pull on for dishes, every massage at the nail matrix writes a new pattern. Two weeks from now, your nails will tell a different story—smoother, more resilient, more you.
Actionable takeaways to keep close:
- Oil and balm every night. Cotton gloves make a visible difference.
- Keep nails short and softly rounded for two to four weeks.
- Reapply a breathable base every two to three days.
- Wear gloves for chores and avoid prolonged hot water.
- Eat for nail health: protein, omega-3s, iron, zinc, vitamin C.
The goal isn’t perfection. It’s comfort, confidence, and a rhythm that feels like care—because it is.
Estimated word count: ~2,030 words
Frequently Asked Questions (FAQ)
Q: How long does it take to repair nails after acrylics?
A: Most people see improvement in 10–14 days with daily care. Full strength often returns in 4–8 weeks, depending on your nail growth, nutrition, and how gently removal was done.
Q: Which oil is best for post-acrylic nail repair?
A: Jojoba oil absorbs well and mimics natural sebum, making it ideal for the nail area. You can blend it with sweet almond oil for softness and a touch of squalane for extra slip.
Q: Should I use a nail hardener?
A: Skip harsh, formaldehyde-heavy hardeners. Choose a breathable strengthening base coat with ingredients like keratin, calcium, or plant oils. Reapply every two to three days and remove with a gentle, non-acetone remover.
Q: Can I get gels right after removing acrylics?
A: It’s better to wait at least one to two weeks. Use that time to hydrate, seal with base coat, and keep nails short. If you return to the salon, request soak-off gel or a soft builder gel and insist on careful removal next time.
Q: Why do my nails peel after acrylics?
A: Filing and acetone can thin the top layers, making nails more porous and prone to peeling. Reduce friction with a glass file, hydrate daily with oil, and use a ridge-filling base to shield the surface while new growth strengthens.