
Healing Nails Damaged from Acrylics: The Gentle Way
The afternoon light fell across your kitchen table like honey, turning the mug in your hands into a little lantern of warmth. You trace the rim with your thumb, a tiny ritual to slow down after an errand-filled morning. When you finally set the mug down and glance at your nails, you feel that familiar lurch: peeling edges, tender surface, a hitch of sensitivity when your ring brushes the side of your finger. Weeks—maybe months—of acrylics made every gesture feel polished, organized, ready. Now the afterglow is gone, and what’s left are nails that feel a little betrayed.
You rub a bit of balm into a dry cuticle and stare out the window. The sky is that soft, hazy blue that makes you want to start again—new calendar page, fresh routine, a gentler approach. Acrylics can be fun, even a little intoxicating in their neatness. But the maintenance, the fills, the urge to pick at a lifting corner during a meeting—yeah, it can wear you down. You remember tugging at one lifted edge because it snagged on your sweater and now there’s a thin bend in your natural nail. That tender bend is small, but it has your attention.
Let’s be honest: nails carry stories. The day you wrapped gifts too quickly and zipped a ribbon under your nail. The time you cut lemons for a pitcher of bright, tart water and felt the sting of juice seep into a micro-crack. Acrylics made your nails look strong, but the removal and routine wear left them thin and thirsty. Not broken. Not ruined. Just asking you for a softer season.
You rest your palms on the table. One nail catches on the woven placemat, another reminder to slow down. You want that quiet confidence back, the one where you can button a blouse without flinching or fish a key from your bag without a snag. You want natural nails that feel resilient and clean, not just look it. You’re not looking for a miracle. You want a plan that fits your life, adds calm to your mornings, and helps your nails recover with grace.
Take a breath. This is fixable. With a few steady weeks of mindful care—hydration, protection, thoughtful trims—nails damaged from acrylics can bounce back. They need time, consistency, and a routine that respects their structure. You can almost feel the smoothness returning already, like a quiet promise each time you massage in oil at night. It’s the kind of simple care that nourishes more than your hands. It nourishes your pace.
Quick Summary: Here’s a gentle, practical plan to heal nails damaged from acrylics—what to do today, how to care weekly, and how to protect your confidence while they grow stronger.
What acrylics actually do to nails
Acrylic sets look immaculate because the product builds a strong overlay. But the application and removal processes can stress natural nails.
- During prep, the surface is often roughened to improve adhesion. That thins the nail plate.
- Dehydrators, monomers, and adhesives can draw out moisture.
- Repeated fills add weight and leverage; small impacts can lead to micro-tears.
- Removal—improper soaking, prying, or aggressive filing—causes the most damage.
Nails are layered like shingles. When acrylics are forced off, those layers can peel apart. This leads to flaking, rough patches, sensitivity, and sometimes temporary lifting from the nail bed. The good news: nails grow. With smart routine shifts, the new growth can come in smoother and stronger.
Signs your nails need repair now
Not sure how much care you need? Look for these signs:
- Flaking or peeling at the free edge
- A soft, bendy nail plate that feels thin
- White, chalky patches from over-dehydration
- Splitting down the center or at the corners
- Tenderness pressing on the nail surface or sides
- Lifting from the nail bed (a gap that looks lighter)
If you see green or brown patches under the nail, or notice a bad odor, pause and consult a professional. That can signal a bacterial or fungal issue. And if a nail is lifting significantly or painful to the touch, a dermatologist visit is worth it. Catching issues early prevents longer detours.
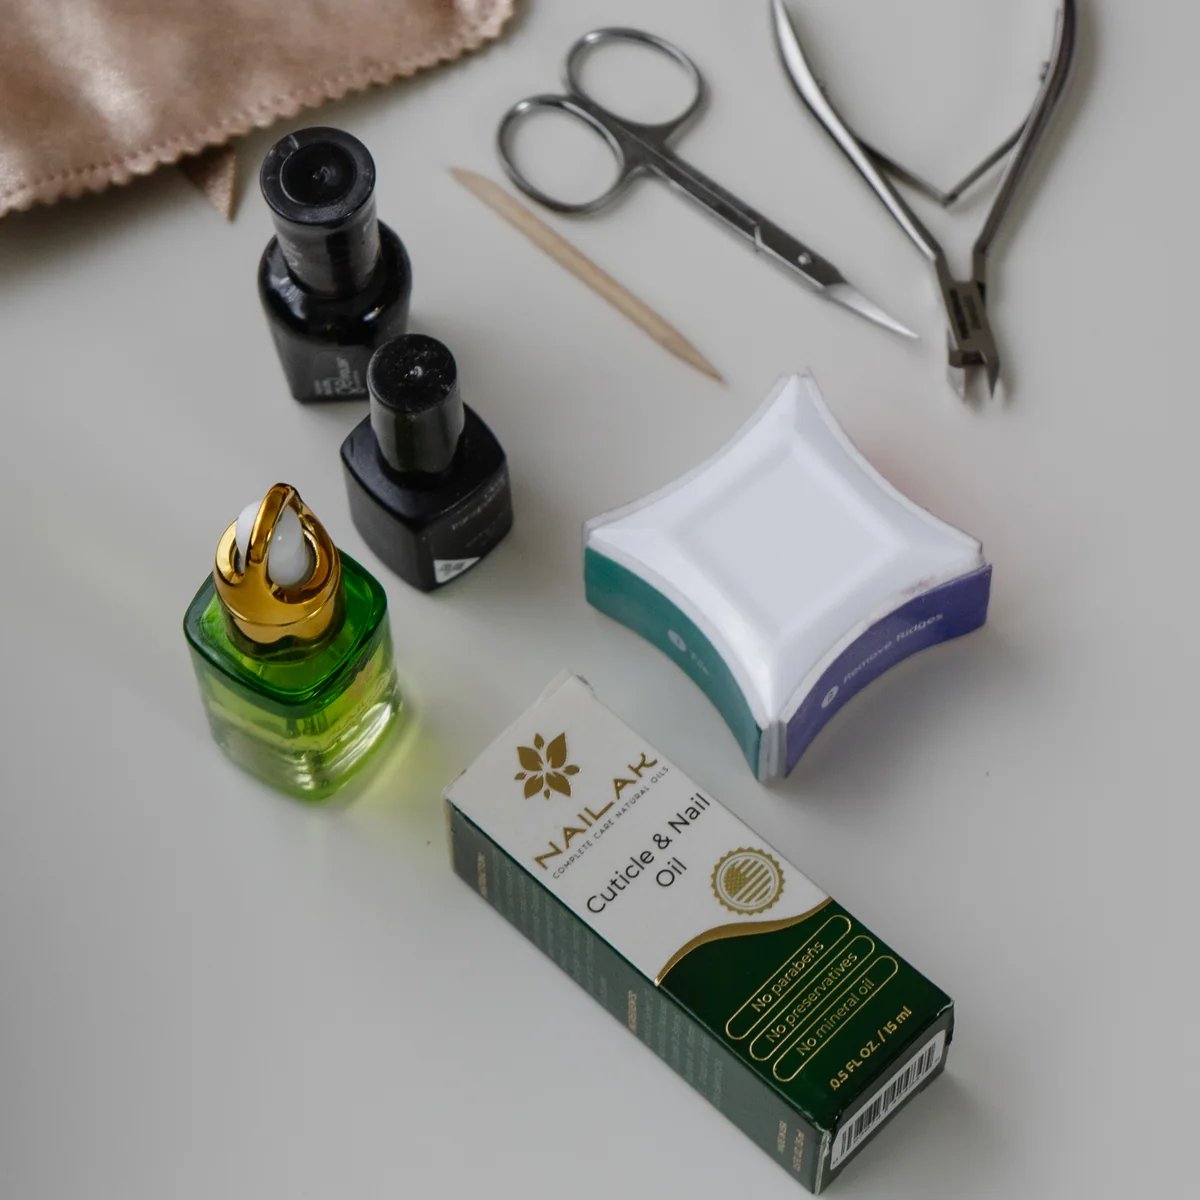
First aid for nails damaged from acrylics
Think calm, clean, and protective. Start with these steps today.
Trim and shape short
Keep nails short to reduce leverage and prevent further splits. Use a fine-grit file (240+) and move in one direction. Avoid sawing back and forth.Wash, then hydrate
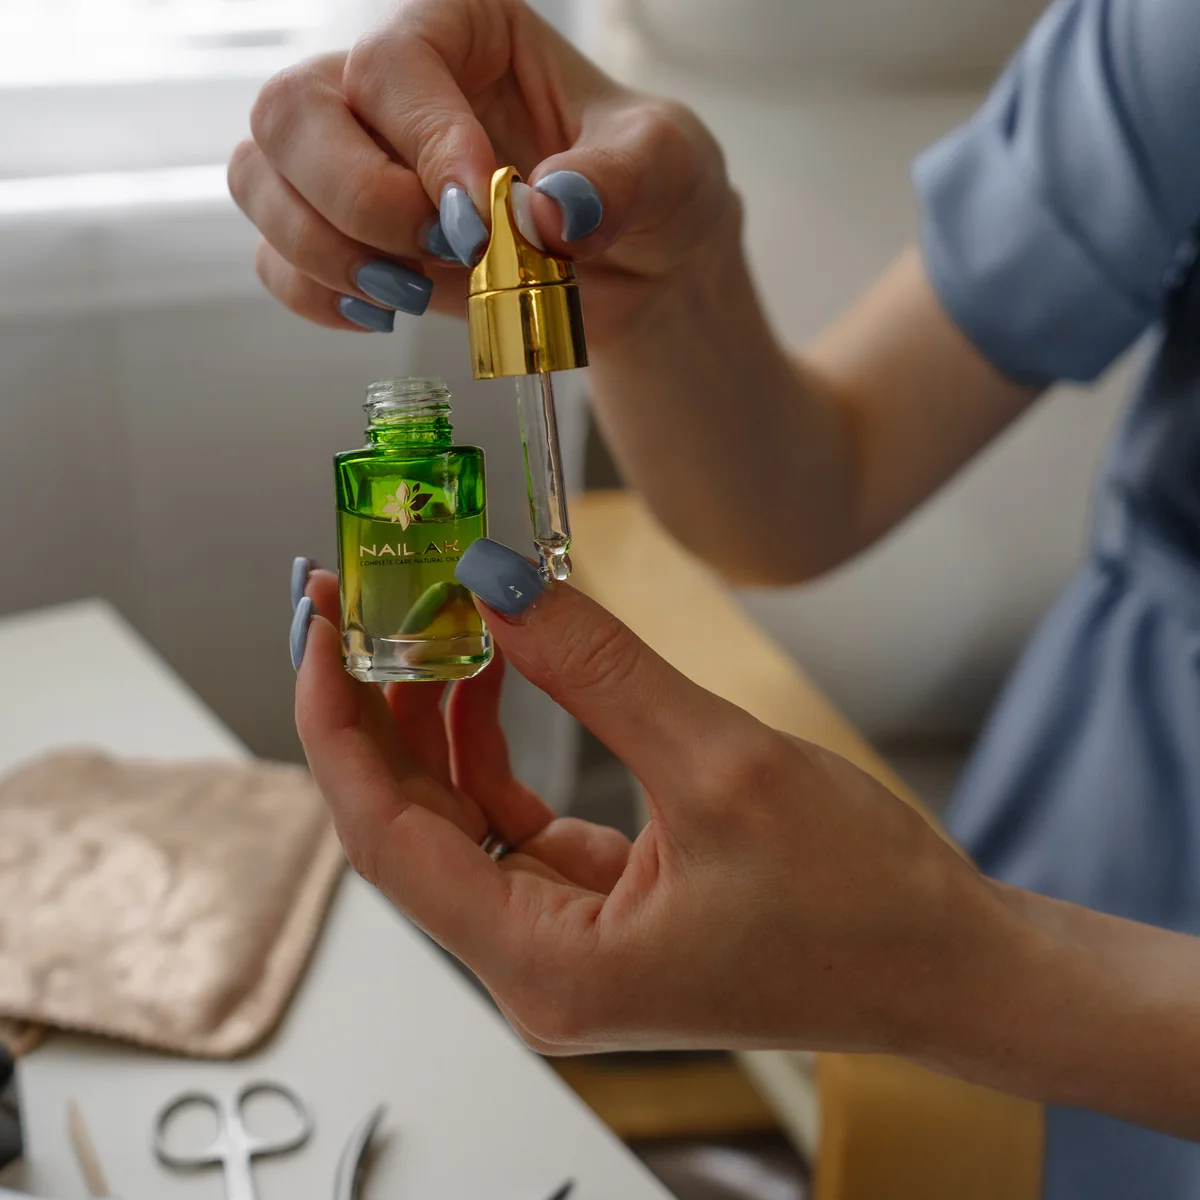
Clean hands with a gentle soap, pat dry, and immediately apply a nourishing oil (jojoba, sweet almond, or squalane). Seal with a rich hand cream. Reapply oil nightly.Patch micro-tears
For small splits, try a temporary silk wrap or a “teabag” mend under a breathable base coat. It stabilizes the area while it grows out.Skip harsh removers
Avoid acetone for at least two weeks if you can. If you must remove polish, choose a non-acetone remover and limit soaking time.Protect the skin barrier
If a corner catches and tears the sidewall skin, clean gently and apply a hydrocolloid bandage overnight. It helps keep the area moist and protected.Hands off
No peeling or scraping. Picking can lift layers and invite bacteria. If a piece is catching, file it smooth instead.Wear gloves for chores
Detergents and long water exposure weaken nails. Wear nitrile or rubber gloves for dishes, cleaning, and any soaking tasks.
Small actions add up. Your nails respond within days to consistent moisture and reduced stress.
A four-week nail repair routine
Healing is a rhythm. Here’s a simple, evidence-minded plan you can follow without overthinking.
Week 1: Soothe and stabilize
- Keep nails short and rounded to prevent snags.
- Morning: oil, then hand cream; reapply after handwashing.
- Night: oil and thick balm massaged into nails and cuticles for 60 seconds.
- Optional: use a strengthening base with lightweight nylon or calcium to add a flexible shield. Avoid rigid, formaldehyde-based hardeners on thin nails—they can cause snapping.
- No buffing this week; focus on hydration.
Week 2: Gentle reinforcement
- Repeat oiling and moisturizing steps.
- Apply a ridge-filling, breathable base every 3–4 days. Remove with non-acetone remover, then reapply.
- If you used a silk wrap, maintain it with care—avoid picking.
- Lightly buff only if absolutely necessary to smooth peeling edges. Use the softest side, and keep strokes minimal.
Week 3: Strength without stress
- Continue oiling twice daily.
- Add a weekly nail “mask”: soak hands in lukewarm water for 2–3 minutes, pat dry, massage in oil, then cream, then a thin layer of occlusive balm. Wear cotton gloves for 30 minutes.
- Keep nails trimmed; don’t chase length yet. Prioritize durability.
Week 4: Protected growth
- Maintain hydration routine.
- If your nails feel stronger, allow 1–2 mm of growth before shaping.
- Try a sheer, protective polish or treatment tint to boost confidence without smothering the nail.
- Evaluate: fewer snags? Less sensitivity? If yes, keep this cadence for another month as you grow out damaged sections.
Checklist of what helps most:
- Oil daily, cream often, balm at night.
- Short, rounded tips to reduce leverage.
- Minimal solvents and zero picking.
- Gloves for chores and cold weather.
- Patience. Real change is measured at the free edge.
Nourish from the inside out
Nails are keratin structures, so they thrive on steady nutrition and steady habits.
- Protein: Aim for balanced intake each day—eggs, legumes, tofu, fish, or poultry.
- Iron and zinc: If you’re frequently fatigued or notice slow nail growth, discuss labs with a provider. Iron and zinc support keratin formation.
- Biotin: Most people get enough from food. Supplements may help some, but talk to your clinician—biotin can interfere with lab results and isn’t a one-size-fits-all fix.
- Omega-3s: Healthy fats support the nail matrix and skin around nails.
- Hydration: Nails bend and peel more when dry. Keep water intake steady and moisturize after washing.
A small lifestyle reset helps too: better sleep, less stress, and a break from soaking manicures. Micro-changes make nails less brittle and more resilient across a month, not just a day.
On the topic of protection, winter can be sneaky-drying. Editors often remind us that sunscreen still matters when it’s cold, especially for hands that drive or walk outdoors. A recent round-up of winter sunscreens highlighted reliable, non-greasy picks that keep skin comfortable—think of it as part of a whole-hand wellness routine that benefits your nails’ surrounding skin too (source: https://www.womenshealthmag.com/beauty/g69918888/best-winter-sunscreens-2026/).
Styling while you heal
You don’t have to choose between natural nails and feeling polished. Style can be gentle.
Keep length modest
Shorter nails look chic and cut snag risk. Rounded-square or oval shapes reduce corner splits.Use a kinder base
Try a breathable, ridge-filling base with flexible strength. Reapply every few days. Remove with non-acetone remover, then oil.Pick subtle color
Sheer milky tints or nail “concealers” blur ridges and brighten the nail bed. They chip less visibly, so you’re less tempted to pick.Consider press-ons—with care
If you need a special-event boost, try short press-ons using adhesive tabs, not strong glue. Press for 10–15 seconds; remove with warm, soapy water and slow, rolling motions. Follow with oil.Upgrade your tools
Use a 240–320 grit file for shaping. Avoid metal pushers; if you must tidy cuticles, use a soft, rubber-tipped pusher after a shower and never cut live tissue.
Here’s the secret: neat edges and hydration do more for the “put-together” look than length ever will.
Rethinking acrylics in the future
Acrylics aren’t the villain; our routines can be. If you return to enhancements, set yourself up for success.
Space out sets
Give nails a recovery week between removal and a new set when possible.Ask for gentle prep
Request minimal surface roughening and careful e-file work only by a trained tech. No heat or pressure. If it burns, say so.Choose soak-off strategies
If you notice prying or scraping during removal, pause. Ask for thorough soaking with warmed acetone wraps and a gentle, orange-wood stick.Commit to aftercare
Apply oil daily during sets and for two weeks after removal. Keep length proportional to your daily activities.Make salon hygiene non-negotiable
Ensure files and buffers are new per client or properly sanitized. Bring your own tools if the salon allows it.
When enhancements are treated as occasional accessories—not permanent fixtures—your natural nails have space to thrive.
A softer kind of confidence
There’s a quiet confidence in hands that feel cared for. Not perfect. Not immovable. Just cared for. When your nails aren’t catching on sweaters or stinging in lemon juice, your day gets smoother. That smoothness trickles into other choices: you add gloves to your bag, order the nourishing lunch, take five minutes before bed to massage in oil. It’s not about rules. It’s a rhythm—one that honors how much your hands do for you.
Your nails will grow out. They always do. What stays is the habit, the small nightly check-in that reminds you you’re worth a gentler pace. And that’s the kind of polish that never chips.
Frequently Asked Questions (FAQ)
Q: How long does it take to heal nails damaged from acrylics?
A: Most people see improvement in two to four weeks with consistent care. Full recovery depends on how much was removed or thinned. Since fingernails grow about 3 mm per month, expect 2–3 months to completely grow out damage.
Q: Should I use a nail hardener on thin, peeling nails?
A: Choose flexible strengtheners and avoid rigid, formaldehyde-based formulas on very thin nails. Those can make nails snap. A better approach is daily oil, a ridge-filling base, and short length until the new growth is sturdier.
Q: What ingredients help repair and hydrate damaged nails?
A: Look for jojoba or sweet almond oil, glycerin-rich hand creams, and ceramide balms. These support moisture retention and the skin barrier around nails. Keep removers gentle and limit acetone while your nails recover.
Q: Can I wear gel or acrylics while my nails heal?
A: It’s best to take a break. If you need a polished look, choose breathable treatments, sheer tints, or short press-ons with adhesive tabs. Keep nails short, oil daily, and plan at least four weeks off enhancements.
Q: Do supplements like biotin really work for nail strength?
A: Biotin may help if you’re deficient, but many people get enough from food. Because biotin can affect lab tests, talk to your healthcare provider before starting. A balanced diet with protein, iron, zinc, and healthy fats often supports better growth.
Estimated word count: ~2,070